Templates for Production, Mixing and Mastering (free download)
Introduction
Every time we open a new project, there's a part of the work we always repeat: creating and ordering tracks, renaming them, assigning a color, creating groups, adding an EQ, a compressor, and so on. This happens in production, but just as much in the mixing and mastering stage. We can cut that time down with a template that's already set up and ready to work with.
I'll walk you through what's worth presetting in each one, and at the end I'll leave you two Ableton Live templates to download.
Production and Mixing Template
Whether you're starting from scratch or you've got a multitrack ready to mix, you'll spend at least the first half hour organizing the project. With a template already built, you can go straight into making music, whether that means creating it or deciding how to mix it.
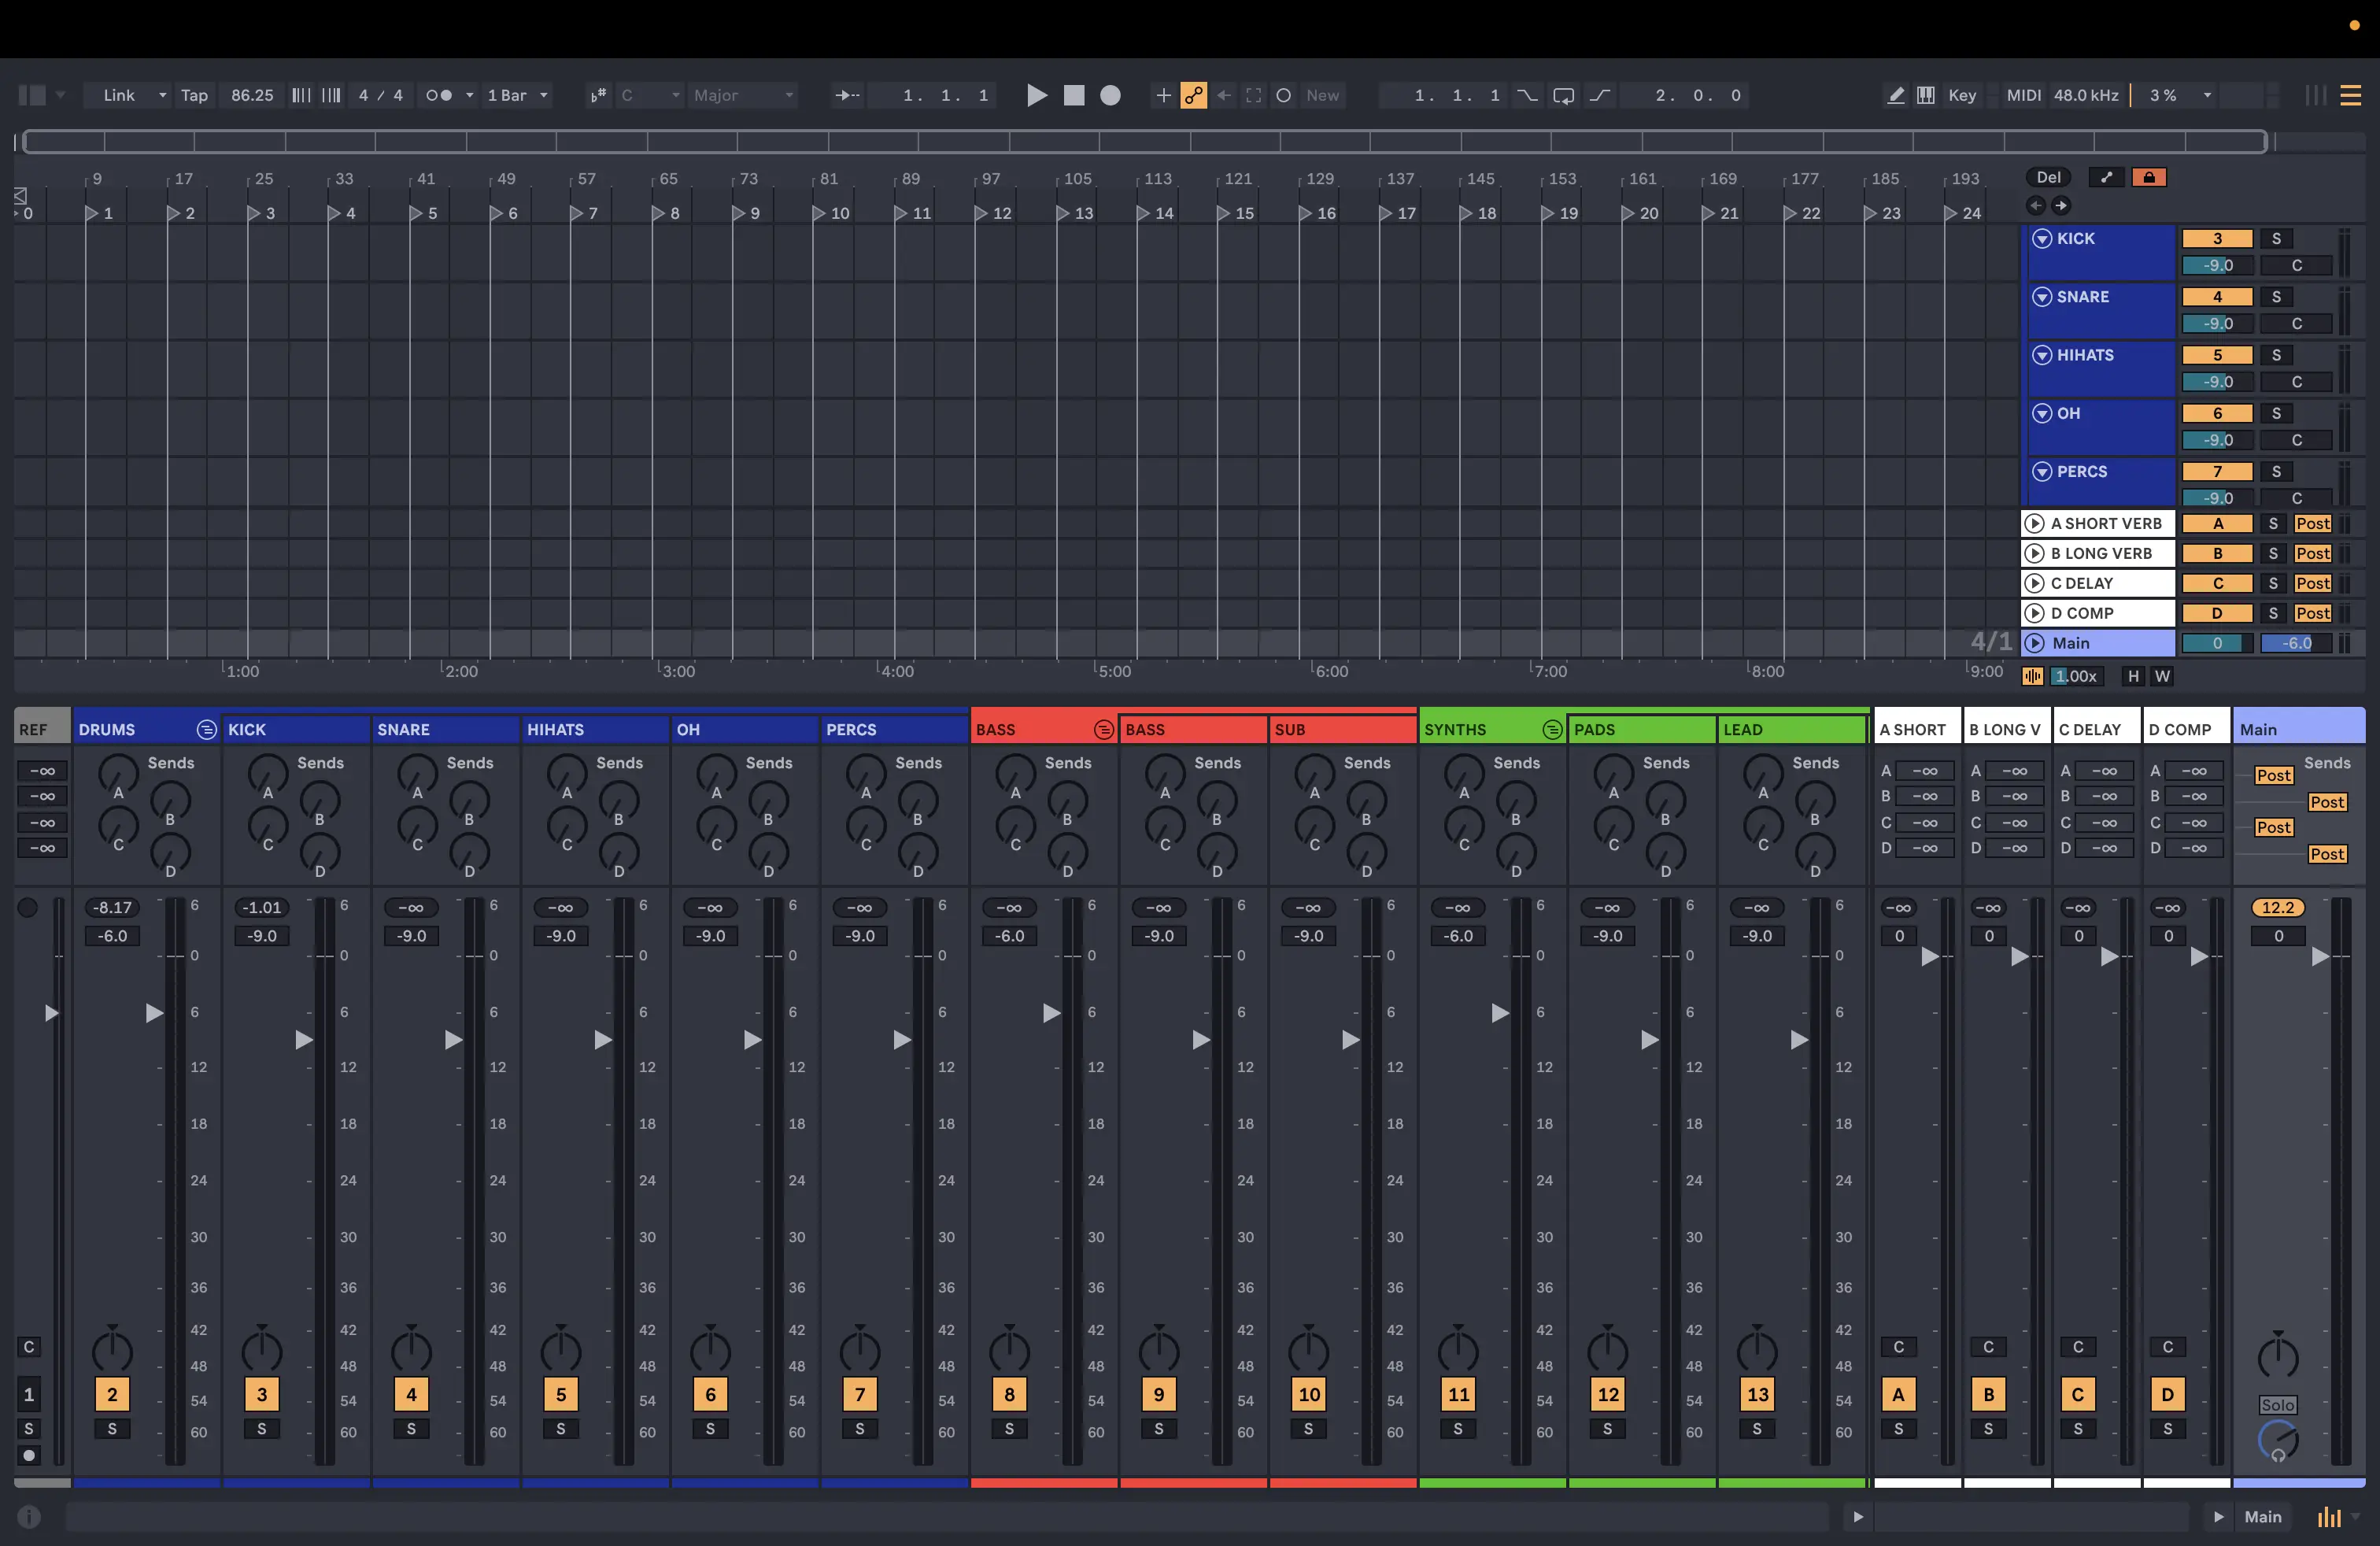
Tracks and groups
A good way to stay organized is to build groups or folders by instrument type.
- Drums: Kick, Snare/Clap, Hi-Hats, Overheads/Cymbals, Room/Percussion, Shakers, etc.
- Bass: Bass, Sub (all the elements that make up the bass instrument)
- Synths: Pads, plucks, leads, arps, etc. (all synthesizers, including acoustic instruments)
- FX: risers, noise, impacts, etc. (all effects and supporting tracks)
- Vocals: Lead Vocal, Backing Vocals, Vocal FX (all vocal tracks)
You can assign a color to each group and its tracks, so it'll be much easier to spot what kind of track you're looking at if you use the same color codes, and the same order, across every project.
Buses or return tracks
In Ableton Live, return tracks are a track type completely separate from the track and group hierarchy. They're their own category, always summing in parallel to the Master (or wherever they're routed), regardless of which tracks or groups send signal to them via "Send". In other DAWs, like Reaper, this separation doesn't exist: a "Bus" track isn't a special category, it's just a track that receives sends, and it can sit inside a regular group of tracks so visually, it can be placed anywhere in the project's organization.
In short: Ableton Live enforces buses above the Master track, which makes it hierarchically simpler.
You can create as many buses as you want, but some of the most common ones when working on production or mixing are reverbs, delays and compression:
- Bus A: Short reverb (room)
- Bus B: Long reverb (hall or plate)
- Bus C: Delay
- Bus D: Compressor
Reference track
It's common to work with one or several reference tracks, loading a reference song to compare against your own during production or mixing. For this, you can create a track, muted by default, placed at the beginning or end of your project.
Initial setup
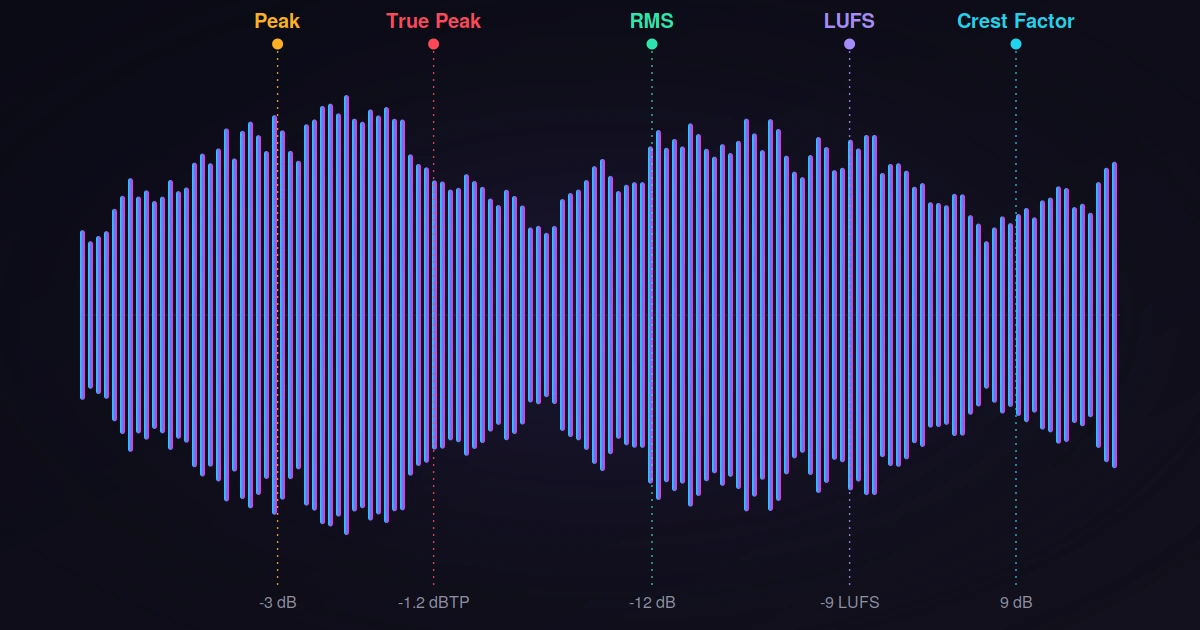
Beyond the visual hierarchy, you can add whatever specific configuration you need. For example, set all faders to a specific level, such as -9 dB, to have enough headroom and avoid distortion at both the track and master level, as we explained in the article dB Peak, RMS, LUFS, True Peak and Crest Factor: comparison and summary table.
You can also add locators, for example every 4 or 8 bars, to jump easily between sections of the song and work region by region.
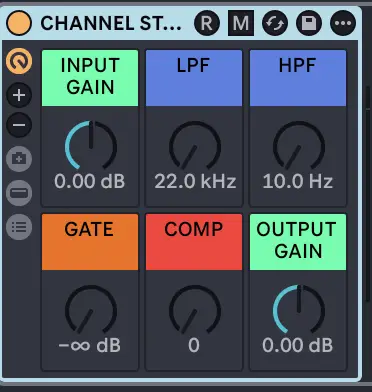
Beyond that, not every DAW has a default "Channel Strip" on its tracks. A Channel Strip is what mixing consoles build into every channel: typically a gain stage, an EQ, a compressor and a noise gate. For the template, you can build your own rack with these devices, so you won't need to add them every time you start a new project, they'll already be built into every track.
Mastering Template
Here the logic is different: there aren't many tracks, there's processing. When mastering, we usually work with one or several reference tracks, or compare against the mixbus itself before the mastering chain. On top of that, even though every song has its own artistic intent and style, we can start from an initial technical baseline and adjust it per song.
Structure
- A "REF" track, muted by default, to compare against our reference. You can also set up a shortcut key or button to solo this track and toggle it easily without relying on the mouse.
- A "MIX" track where we'll drop the mix we want to master.
- All faders here stay at 0 dBFS — we won't touch any of them.
Chain
You can choose whether to add the chain on the "MIX" track or the "MASTER" track. But since we're using other tracks for comparison (references), we'll insert the effects chain on the track holding the mixbus. Otherwise, we'd need to bypass the reference tracks so they don't run through the master chain.
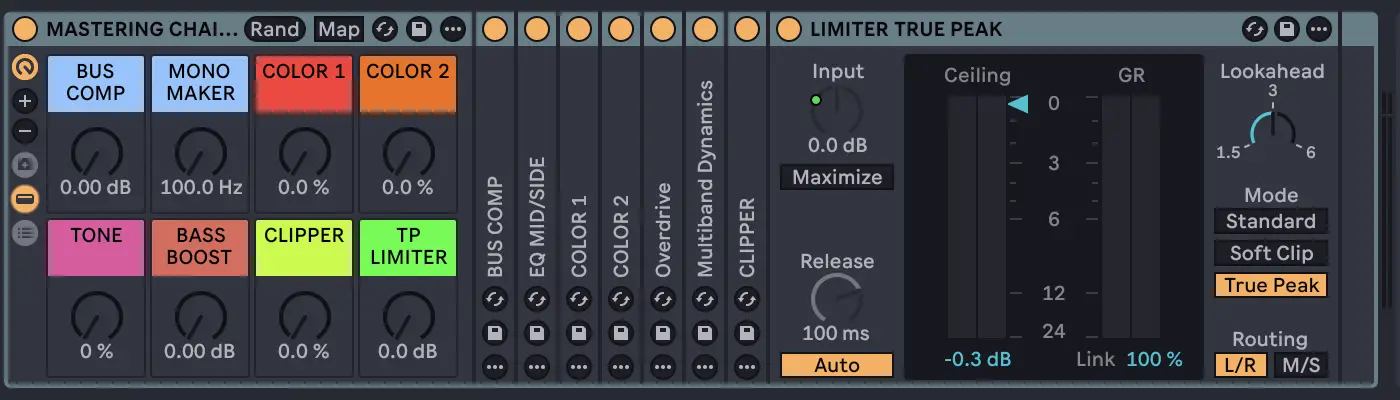
The chain is made up of the basic blocks set to 0 as a starting point, with small adjustments that can start to control, warm up and increase the mix's potential:
- EQ
- Compressor
- Color
- Maximization
Download the templates
I've built two templates for Ableton Live +12.4: one for production and mixing with a built-in channel strip, and another for mastering with a built-in mastering chain. Download them from the right-side panel.
Remember: a template isn't static. Review it and adjust it to your own workflow as it evolves.
Conclusion
A template helps you work more efficiently the moment you start a project, whether that's production, recording, mixing or mastering.
If you want to understand the reasoning behind these blocks, sign up for the Mixing and Mastering Course. You'll learn to build a complete mixing and mastering process, along with advanced techniques, developing your own judgment and applying it to your own project or to existing projects at the Lab.
Support resource
Author
Subscribe to the newsletter
Receive resources, tutorials and exclusive content directly in your inbox.
Got questions?
Put it into practice and share it with the community
Academy
Want to go deeper?
Our courses are designed to take your sound to the next level. Learn the what, the how and the why.